- To be able to make use of the Import Tool, a user must have (or be a member of a group that has) the daImport operations privilege specified for any tables that will be involved in the import.
- As the Import Tool emulates the manual creation or editing of records in EMu, a user also requires any Operations (add and update e.g. daInsert, duEdit) and Record Level Security permissions that are required when adding or updating records manually.
For example, if a user does not have permission to:
- Add a record to a module (the daInsert permission) or update a record in a module (duEdit), no record will be added to or updated in that module when using the Import Tool.
- Add a value to a Lookup List field (specified using the Lookup Registry entry), the import will fail for any record that involves the addition of a value to that Lookup List field.
- If the Import option is greyed out in the Ribbon, you do not have the necessary permissions to use it. Speak to your System Administrator.
- Details about how to produce an import data file can be found here.
In the module in which records are to be imported:
- On the Tools tab of the Ribbon select Import.
The Select File To Import (or similarly named) box will open allowing you to locate the file that contains the data to be imported.
- Locate and select the import file and click Open to commence the Import Wizard.
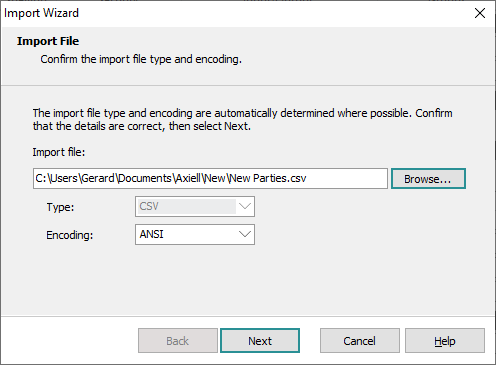
EMu will attempt to identify the file type and encoding used by the import file; if there is any ambiguity, the Import Wizard will open with a screen that asks you to confirm the import file type and / or encoding:

If there is no ambiguity, this screen will be skipped.
Note: If the encoding used in the file is not supported by EMu, you will be unable to proceed with the import.
The presence of a BOM (Byte Order Mark) in the file typically means that the encoding will be identified. - Click Next to continue.

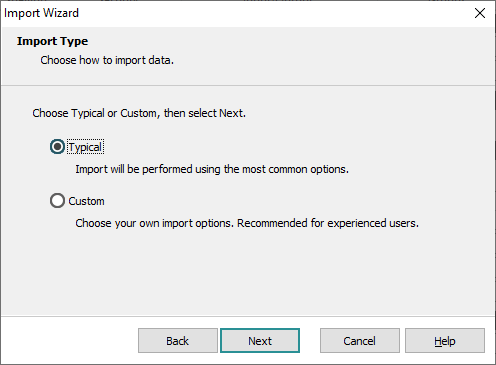
The default option is Typical. Accept this option to import data using the following default import settings:
- Format and data validation is performed (see Validate Data screen for details).
- If a record in the data file attaches to another record (see Attachments screen for details):
- A search is performed of all existing records in the EMu database, which includes any records that have been created so far during the current import.
Note: Records in the import data file are processed sequentially: if record 5 attaches to record 6, no attachment will be made during the import as record 6 has not been created when record 5 is processed.
- If no match is found, a new record is added for the referenced record.
- If one record is found, an attachment is made to that record.
- If more than one match is found, the matching records are displayed so that the correct record can be selected manually.
- A search is performed of all existing records in the EMu database, which includes any records that have been created so far during the current import.
- All records are imported (see Records screen for details).
- A minimal log is generated containing setup options, results and a list of errors if any occur (see Report screen for details).
- Accept the Typical option
-OR-
Select the Custom radio button to change the import settings.
- Click Next to continue.
Read on for details about a:

