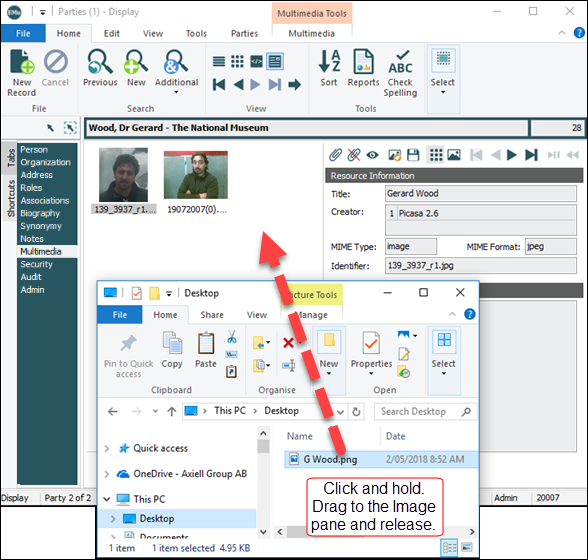
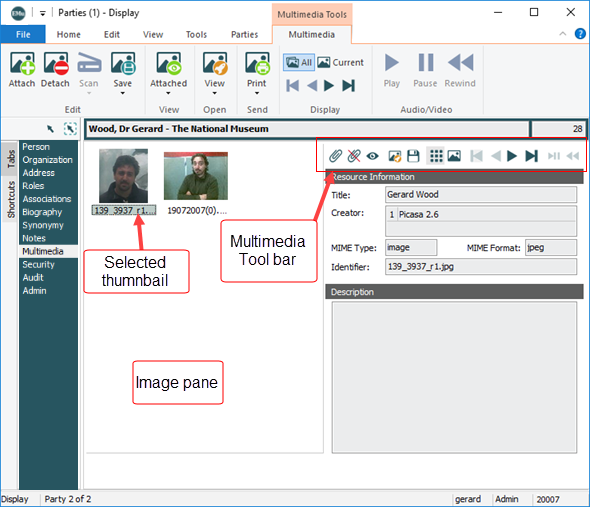
A simple way to add multimedia to EMu is to drag and drop a file (image, audio, video, documents, etc.) or URL on to the Image pane of any module's Multimedia tab. In this example an image is dropped on to the Image pane in the Parties module:
Note: Depending on your system's Multimedia Registry settings and the type of media you are adding, EMu will automatically generate various resolutions and extract metadata, etc.
This will create a new Multimedia record and attach it automatically to the current record![]() The record currently displayed in Details View or highlighted in List View (there is a faint dotted line around it). It is only possible to have one current record at a time..
The record currently displayed in Details View or highlighted in List View (there is a faint dotted line around it). It is only possible to have one current record at a time..
Note however that the Multimedia record created will only contain minimal data (default values, extracted metadata, generated resolutions, etc.). If extra data exists, the Multimedia record may need to be updated manually.
If you use a Remote Desktop Connection (RDP) to access an installation of EMu hosted by Axiell, it is necessary to use File Explorer located on the RDP server when adding media files from your desktop or share drives to EMu. You cannot drag and drop media files using File Explorer installed on your local desktop to do this.
The simplest way to add multimedia to the Multimedia module is to:
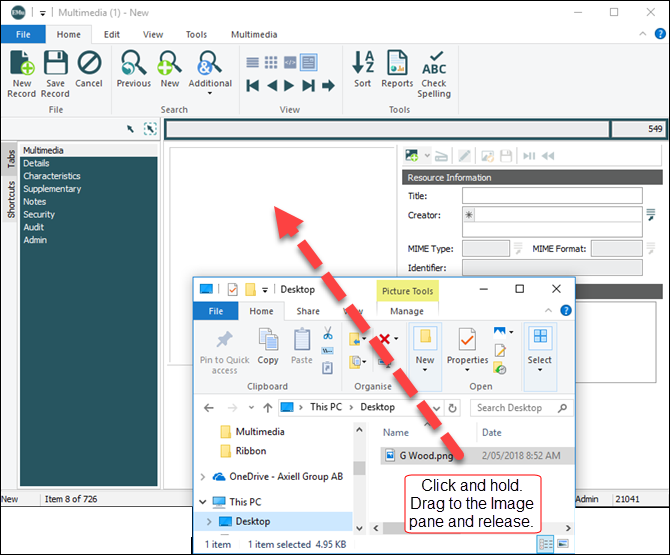
- Add a new record in the Multimedia module.
- Drag and drop a file (image, audio, video, documents, etc.) or URL (from the address bar in a browser) on to the Image pane of the Multimedia tab:
Alternatively:
Click Add Resource
 in the Multimedia Toolbar
-OR-
Click Add on the Multimedia tab of the Ribbon.
The Open box displays, allowing you to navigate to a local or network folder.
- Locate and select the file to be added and click Add (or double-click the file).
The resource is added to the Multimedia repository and displays in the Image pane of the Multimedia record. Information (including metadata) is extracted from the file and many fields and tabs are automatically completed.
- Complete the Resource Information details, add a description if required, etc.
- Save the record.
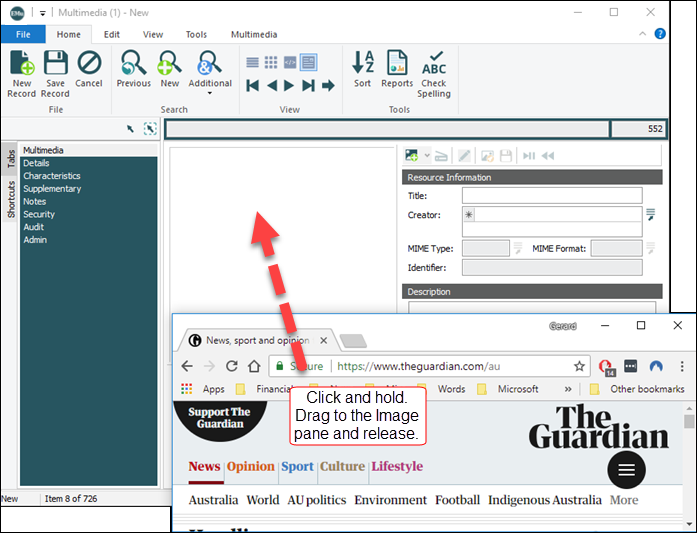
The simplest way to create a Multimedia record for a URL is to
- Add a new record in the Multimedia module.
- Drag and drop a URL on to the Image pane of a Multimedia tab (in the Multimedia module or any module with a Multimedia tab):
Alternatively:
Click Add Resource
 in the Multimedia Toolbar and select URL or Reference from the drop list
-OR-
Click Add>URL or Add>Reference on the Multimedia tab of the Ribbon.
The Add URL or Add Reference box will display:
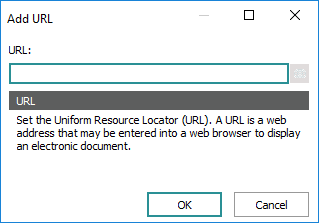
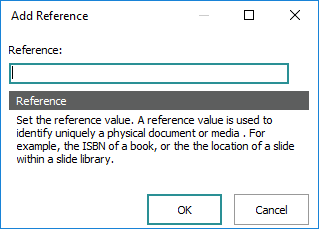
- Enter details in the text box and click OK.
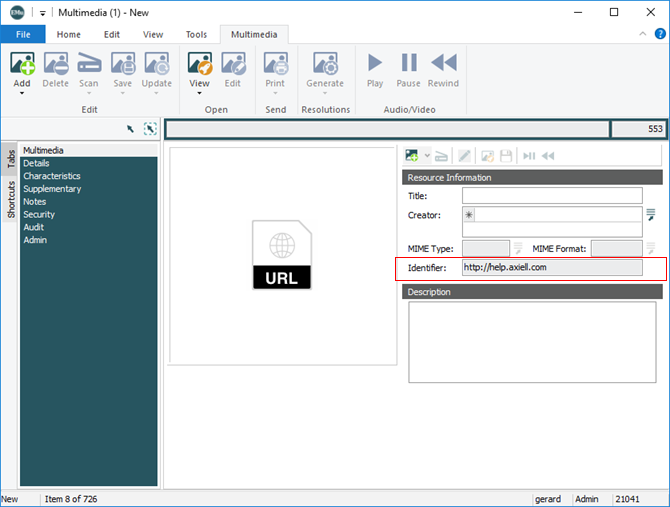
Details display in the read-only Identifier: (Resource Information) field, e.g.:
Tip: Double-click a URL icon in the Image pane to open the URL in your browser.
- Complete any other details and save the record.
The multimedia repository in which resources are saved can be divided into partitions. Access to the multimedia resources stored in each partition can then be limited to specific users or groups. An institution may want to restrict access to sensitive or confidential information by limiting access to a specific partition to only a few users.
To specify in which partition a resource is to be stored:
- Add or search for a resource in the Multimedia module.
- On the Characteristics tab, select a repository from the Repository: (Characteristics) Lookup List.
- Save the record.
Permission to add new formats is controlled by the Multimedia|Operations Registry entry.
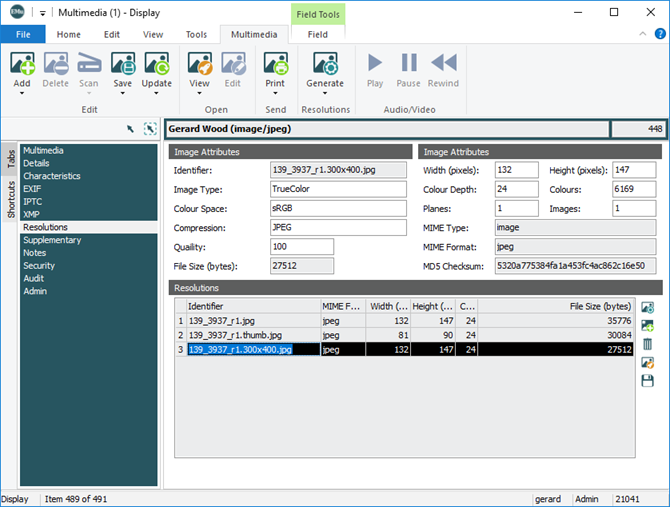
Each multimedia record that contains a document / file (that is non URL or Reference records) has an associated Resolutions tab (in the case of images) or Documents tab (for all other media). The tab contains a list of all the formats and sizes registered for the original document. It is possible to add new media to the list.
Note: It is assumed that the new media only differs in terms of format not content. The System cannot check that an added document / file contains the same content as the original.
To add a new format:
- Locate the record to be updated in the Multimedia module and select the Resolutions (for image based media) or Documents (for other media) tab.
- Click the Add Resolution...
 or Add Document...
  button beside the Resolutions or Documents table
-OR-
Select Add>File on the Multimedia tab of the Ribbon.
The Open box displays, allowing you to navigate to a local or network folder.
-
Locate and select the file to be added and click Add (or double-click the file):
- An image will be appended to the Resolutions table. The System will determine the properties and provide initial values.
- A document will be appended to the Documents table.
Whenever a new file type / resolution for a document or image is added to an existing multimedia record the record is placed in Edit mode. The update can be saved or cancelled.
Detail about multi-resolution support is available here.
Authorized users are able to open the master multimedia resource in an external editor, edit it and save it back to EMu.
Note: Only the master version of a resource can be edited (the first item in the Resolutions / Documents table).
To edit a multimedia resource:
- In the Multimedia module, locate the record of the resource to be edited and select the Multimedia tab.
- Select Edit on the Multimedia tab of the Ribbon
-OR-
Click the Edit Resource
 in the Multimedia Toolbar.
Note: The Edit option is only enabled in the Ribbon when the Multimedia tab (listed in a module's Tabs pane) is selected in Display mode.
The multimedia resource will display in the application that is associated with its media type (jpeg, gif, Word doc, etc.), e.g. a Word document will open in Microsoft Word, a graphic may open in Photoshop or Paint, etc.).
Note: The association between media types and applications is managed locally on each computer (Control Panel>Folder Options>File Types).
- Edit the resource.
- Save the file.
The modified file will be saved back to EMu.
It is possible to save (download) a multimedia resource to a location outside of EMu (your PC for instance). If the multimedia resource has several resolutions, it is possible to select which resolution to save.
In any module with a Multimedia tab (including the Multimedia module):
- Select the Multimedia tab in the Tabs pane.
- Select Save Resource
 in the Multimedia Toolbar:
Note: If there is more than one resource in the Image pane, first select the resource to download.
This option allows you to download the master resolution / document (the first item listed in the Resolutions / Documents table in the Multimedia record for the resource).
To download a different resolution / document:
- Select Save on the Multimedia tab of the Ribbon.
A drop list will display with all available resolutions / documents.
- Select a resolution.
The Save Multimedia box displays.
- Browse to the folder in which you want to save the resource and click Save.
- Select Save on the Multimedia tab of the Ribbon.
In the Multimedia module it is also possible to download resources on the Resolutions / Documents tabs:
Records in almost every module can include multimedia resources. There is no limit to the number of multimedia resources that can be included with a record, nor the type of those resources. There are several methods available for attaching multimedia to records. In the following examples we add multimedia to a Parties record:
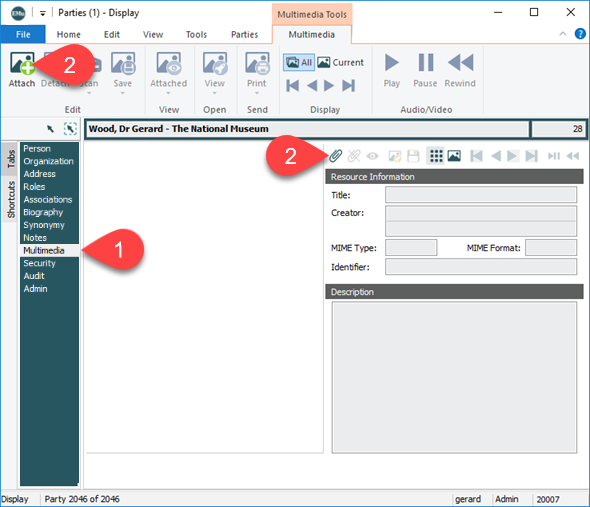
- In Details View select the Multimedia tab.
- Select Attach on the Multimedia tab of the Ribbon
-OR-
Click Attach Multimedia
 from the Multimedia Toolbar:
The Multimedia module displays in Search mode.
- Search for and select the multimedia record(s) to attach.
- In the Multimedia module, click Attach
 on the Home tab of the Ribbon:
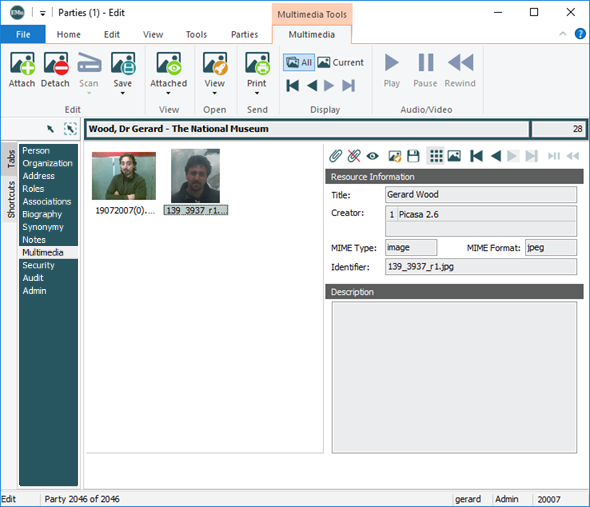
The Multimedia module closes and thumbnails of the attached multimedia display in the current record:
- Save the record.
-
In Details View select the Multimedia tab.
- Open the Multimedia module and search for the records to be attached.
- Click and hold Drag Current Record
 and drag and drop on the Image pane of the other module
-OR-
In List View, click and hold the record and drag and drop on the Image pane of the other module (similarly to selected records as shown below).
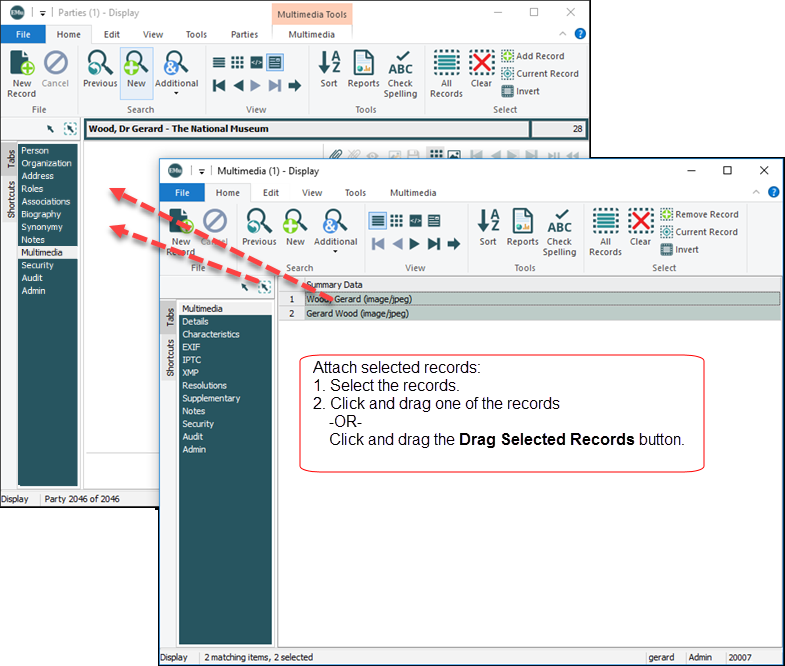
To attach selected records:
- Select one or more records.
- Click Drag Selected Records
 and drag and drop on the Image pane of the other module
-OR-
In List View, click and hold one of the selected records and drag and drop on the Image pane of the other module:
A thumbnail for each attached multimedia resource displays in the multimedia window:
- Click and hold Drag Current Record
- Save the record.
- Locate the record with an attached multimedia resource.
- In Details View select the Multimedia tab.
- Select the resource to be detached (if more than one resource is listed in the Image pane).
- Click Detach Multimedia
 from the Multimedia Toolbar
-OR-
Select Detach on the Multimedia tab of the Ribbon.
The resource is no longer attached to the record.
Note: Detaching a multimedia resource from a record does not delete the multimedia resource from the Multimedia module.
- Save the record.
