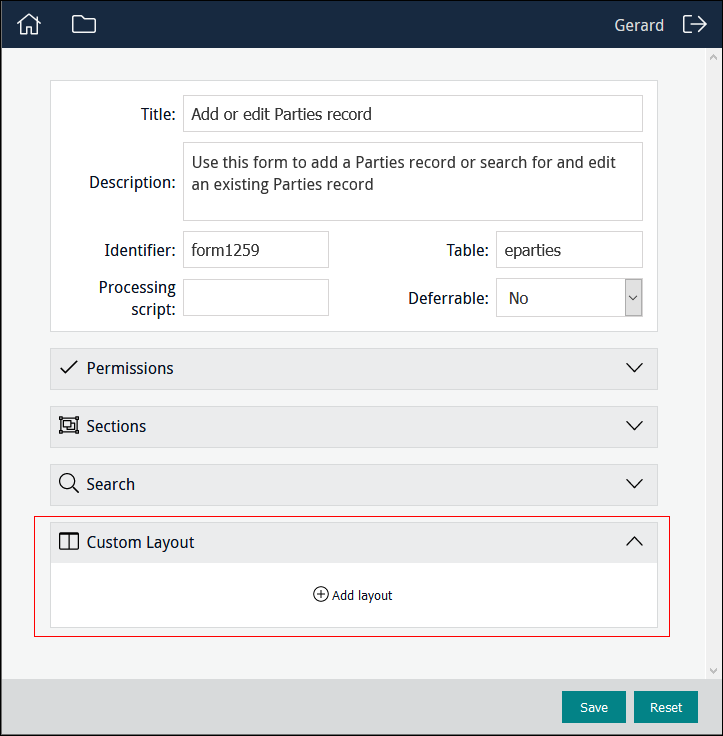
The Custom Layout section of the Form Designer enables designers to customize the layout of a Form by assigning sections to columns:
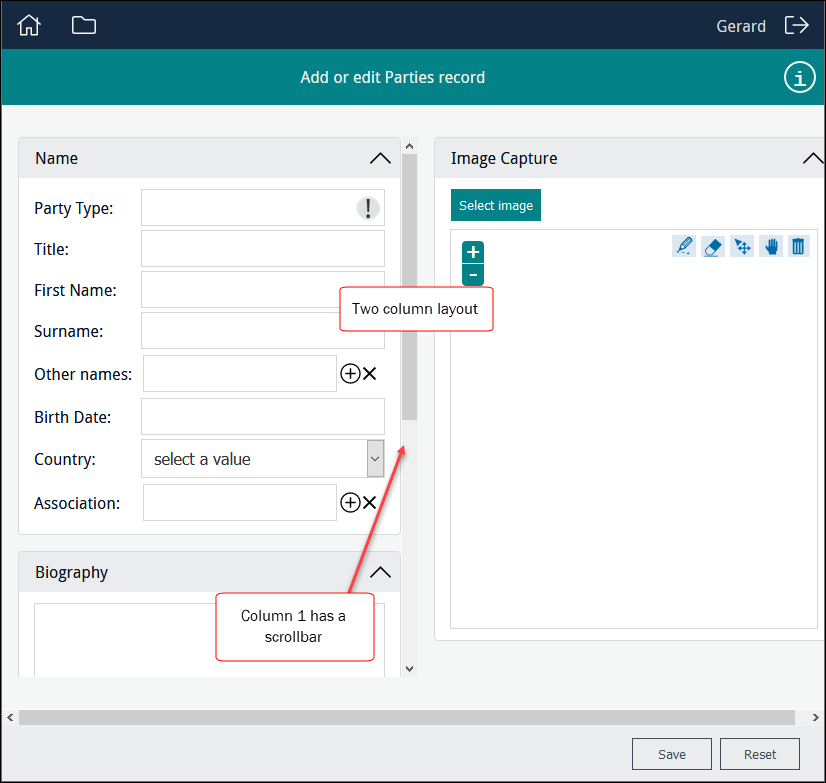
By default sections are presented one above the other in the order in which they are arranged in the Form Designer. This sort of layout is not always the most useful however. If a Form includes an image control, it may be more useful to present the image and data entry fields side-by-side in two columns. If there are lots of data entry fields, it would be ideal for the columns to be independently scrollable so that the image is always visible:
With the Custom Layout section of the Form Designer it is possible to:
- Specify one or more columns and assign Sections to columns.
- Specify which column(s) are scrollable.
Note: It is only possible to design a custom layout with the Form Designer (i.e. for data entry Forms). The Editors and Statistics Designers do not enable custom layouts.
How to design a two column layout
For this example we want two columns, with an image in the right column and data entry fields in the left. Sections are assigned to columns, so the first step in designing a custom layout is to add sections and fields to the Form.
In this example we create a layout with two columns:
- The first column will hold all the data entry fields.
- The second column will have a single image field
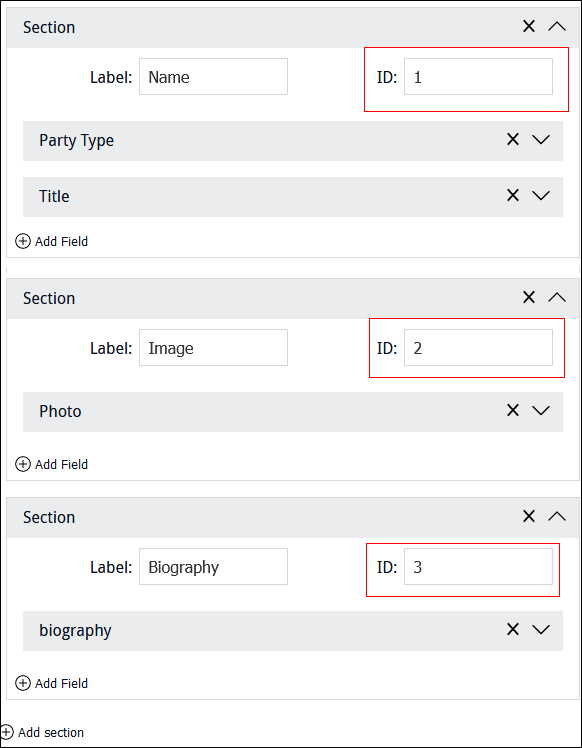
When we add a section to a Form, an ID is automatically assigned to the section:
We assign these section IDs to columns to determine where sections will display on a Form.
When you have added the required sections and fields to your Form:
- Click
 in the Custom Layout section of the Form Designer.
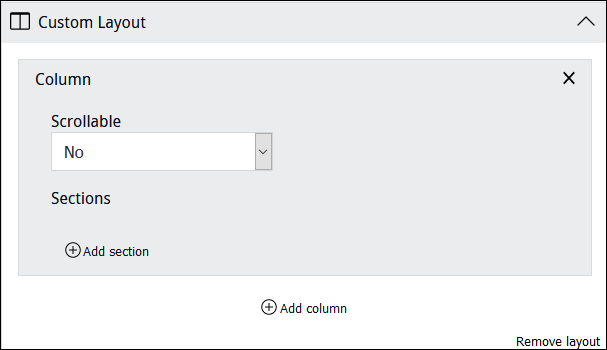
 - Click
 to add a column to the Form:
 - Click
 .
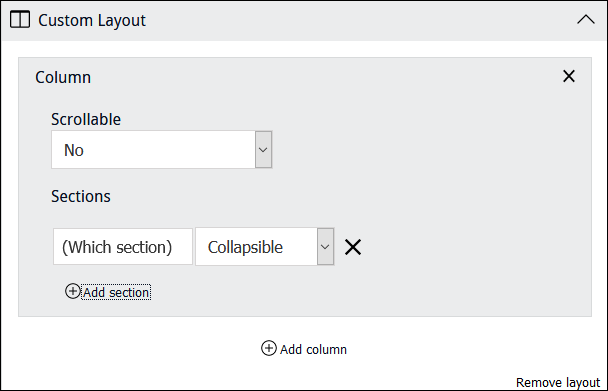
.For each section added to a column, two pieces of information are required:
(Which section)
Enter the ID assigned automatically when the Section was created.
Note: A section can only display once on a Form.
Collapsible / Not collapsible
Specifies whether a section can be toggled open / closed (collapsed or not).
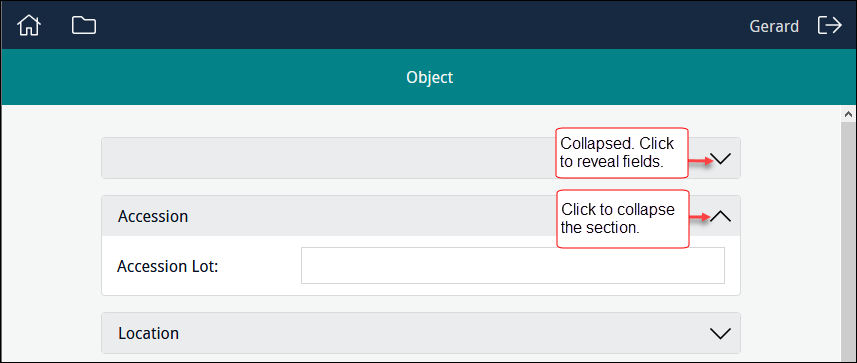
By default, sections are collapsible and the Expand / Collapse toggle will display in the section's Title bar:
- Assign as many sections to a column as required. Adjust the order of sections within a column by dragging and dropping a section.
- Add one or more columns.
- Click
 to save the Form.
A Custom Layout is added to the Form.
Note: Click  in the Custom Layout if you need to remove it.
Next we assign sections to a column.
The order of columns in the Form Designer determines their display order on the Form: the first (top) column in the Form Designer will display on the far left of the Form, the last (bottom) on the far right. Adjust their order by dragging and dropping them.
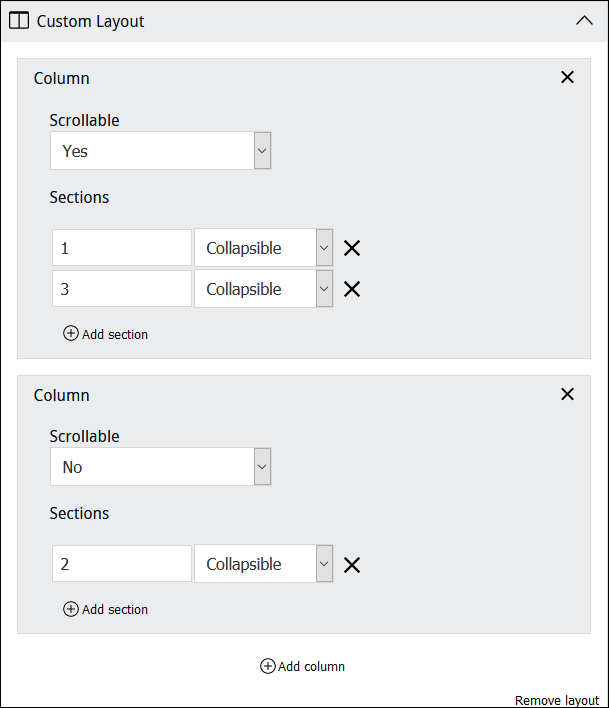
The custom layout shown above is configured as:
