Scheduling an operation is similar to creating any other record:
- Select
 in the Command Centre to display the Scheduled Operations module.
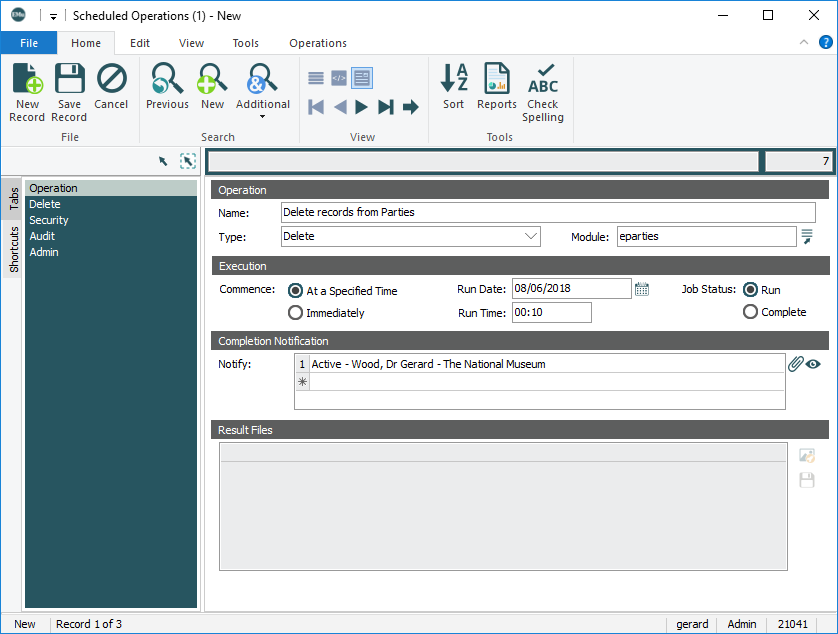
 - On the Operations tab enter a descriptive name for the operation in the Name: (Operation) field.
- Select the type of operation to be performed from the Type: (Operation) drop list.
By default, there are three types of operation to choose from:
- Delete
Delete a series of IRNs from a module.
- Image Import
Import images from a directory into the Multimedia module.
- Merge
Merge one or more records with a Target record in a module.
Note: System Administrators can define additional operations. See How to create an additional type of Scheduled Operation for details.
- Delete
- In the Module: (Operation) field, select the module in which the operation is to be performed.
Note: When scheduling an Image Import it is not necessary to specify a module as emultimedia (the Multimedia module) is implicit to the operation (images are imported into the emultimedia table).
- In the Execution group of fields specify the time that the operation will be executed. Options include:
- At a Specified Time: specify the date and time that the operation will run.
- Immediately: the operation will commence as soon as the record is saved.
 A date and time specified here is the earliest that the operation will be run
The actual time at which an operation is run will depend on when the emuoperations script is scheduled to run:
emuoperationsis the script used to execute an operation that has been scheduled in a record in the Schedule Operations module. When emuoperations is run, it looks for any operations that were scheduled to run prior to the current date and time and commences them. Thus, if emuoperations is scheduled to run once per day, it will commence any operation scheduled to run in the previous 24 hours (in theory an operation could have been scheduled to run 23 hours and 59 minutes earlier). If emuoperations is to be run once per day, it probably makes sense therefore to schedule operations close to the time at which emuoperations is run. Alternatively, emuoperations can be run at various times throughout the day. - In Notify: (Completion Notification) attach the Parties record for anyone who is to be notified by email when the scheduled operation has completed.
Note: Email notifications will only be received by parties added to the Notify: (Completion Notification) table if their Parties record includes a valid email address in the Email: (Internet Details) field.
Job Status: (Execution) indicates that the operation is waiting to be run, or that it has been run and is complete. Note that if an operation terminates unexpectedly, the status will remain as Run until the operation is restarted and it completes.
- Complete details on the appropriate tab:
 Delete
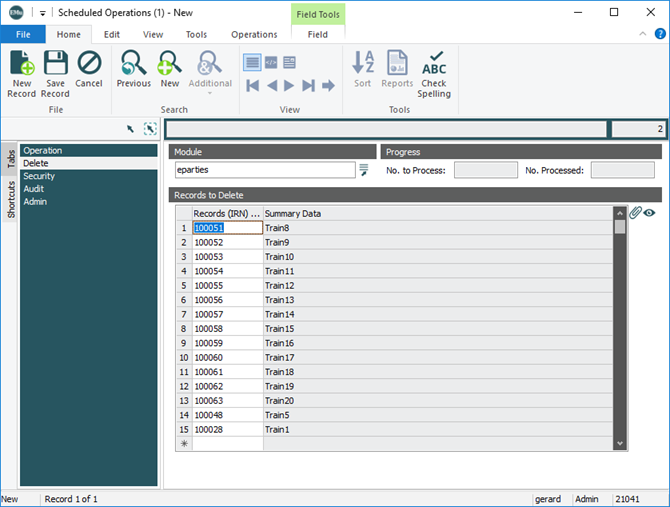
When Delete is selected from the Type: (Operation) drop list on the Operation tab, the Delete tab displays:
- The Module field will list the module from which records will be deleted if a module was specified (Step 4) on the Operation tab.
If a module was not selected on the Operation tab, specify in the Module field which module the records are to be deleted from.
- In the Records To Delete table add the records that are to be deleted from the module specified in the Module field.
 Image Import
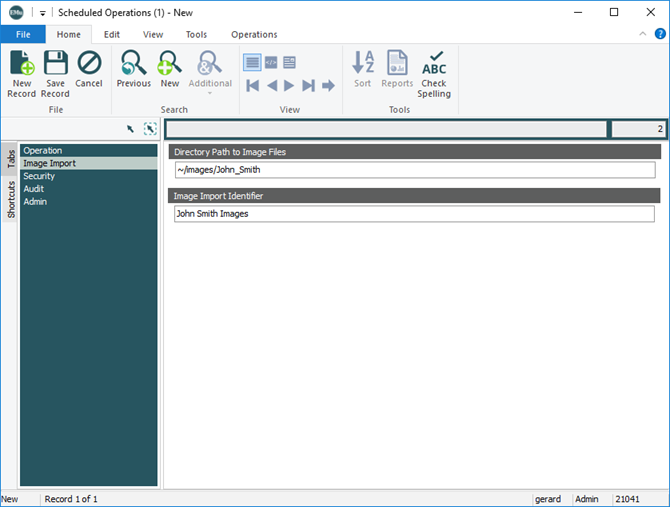
When Image Import is selected from the Type: (Operation) drop list on the Operation tab, the Image Import tab displays:
- In Directory Path To Image Files, enter the pathway to the image files to be imported.
The path may be a full path:
/home/emu/..or a relative path:
~/../..or../.. - If required, enter an identifier in the Image Import Identifier field. The value entered here will be stored in the Import Identifier field on the Admin tab of all Multimedia records created through this scheduled import:
Full details about Imports can be found here.
 Merge
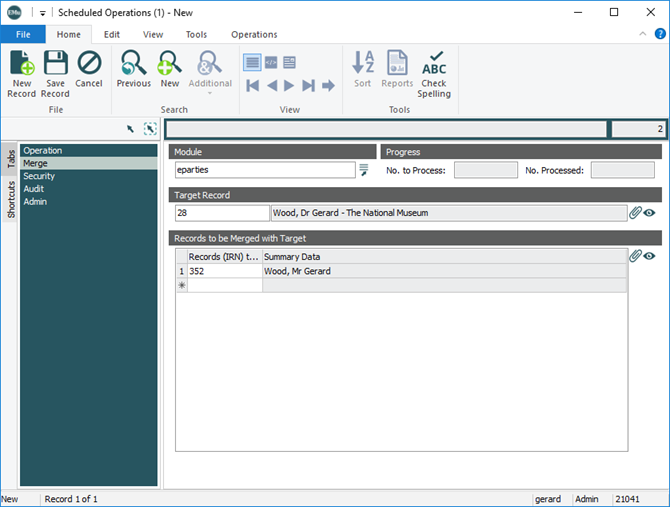
MergeWhen Merge is selected from the Type: (Operation) drop list on the Operation tab, the Merge tab displays:
- The Module field will list the module in which records will be merged if a module was specified on the Operation tab.
If a module was not selected on the Operation tab, specify in the Module field in which module the merge will take place.
- In the Target Record field add the record that will be the target of the merge (i.e. the record with which one or more records will be merged):
- Click
 beside the Target Record field to open the module specified in the Module field.
 - Search the module for the Target record and click Attach on the Home tab of the Ribbon.
Summary Data
 Every record has a Summary Data field. Summary Data is a combination of key data in a record (taken from one or more fields). In Details View the current record's Summary Data displays beneath the Ribbon. A target record's Summary Data displays in an attachment field when an attachment has been made. Which field or combination of fields in a module is used to make up Summary Data can be specified by each institution (and implemented by Axiell developers). from the target record is added to the Target Record field.
- Click
- In the Records To Be Merged With Target table add the records that are to be merged with the Target record:
Click
 beside the Records to be merged with Target field to open the module specified in the Module field.
- Search the module for one or more records to merge with the target record.
- Select the record(s) to merge and click Attach on the Home tab of the Ribbon.
Summary data from the attached record(s) is added to the Records to be merged with Target field:
Full details about Merge can be found here.
- The Module field will list the module from which records will be deleted if a module was specified (Step 4) on the Operation tab.
- Save the record.
Note: When an operation has run, details are added to the Result Files table. From here they can be saved and viewed.


