It is possible to scan:
- an image and save it directly into the Multimedia module.
- documents from all EMu modules that allow multimedia to be displayed.
Tip: It is also possible to scan multi-page documents where the connected scanner supports such functionality. Once the pages are scanned, a multi-page image format should be used to save the document (e.g. TIFF). If the selected image format does not support multi-pages, then only the first page will be saved.
Images can be saved in one of the following formats:
- BMP
- GIF
- JPEG
- PCX
- PNG
- TGA
- TIFF
It is possible to select the type of compression to apply to each file scanned. Compression options are:
- No Compression
- CCITT Group 3 (Fax 3)
- CCITT Group 4 (Fax 4)
- LZW
- PACKBITS
Note: Image compression can only be applied to images saved in TIFF format.
The following instructions will differ for different makes of scanners and different hardware configurations. For the most part the process is straightforward but you may find that you are required to perform different steps. Typically, on-screen instructions will guide you through the necessary steps.
Note: See How to generate resolutions for an image for details about Compression and Quality settings.
It is possible to scan documents / images:
To scan an image / document and save it in the Multimedia module :
- Add a new record to the Multimedia module.
- Place the document to be scanned on the scanner tray.
- On the Multimedia tab of the Ribbon, click Scan.
What happens next depends on what devices are installed and the setup of your particular scanner. On-screen instructions should guide you through any additional steps. For instance, if more than one device capable of scanning is attached to your computer, you will be requested to select the device to use.
In some cases, the document / image to be scanned will be previewed automatically in the scanning application; in others it will be necessary to select a Preview option.
- Prepare the scan as required. For instance, you may wish to:
- Crop the image / document.
- Scan in full colour or black and white.
- Scan in high / low resolution, etc.
- Scan the image / document.
The Add Scanned Image box displays:

- Select the appropriate settings from the Format (e.g.
TIFF, BMP, GIF) and Compression (e.g. No Compression, LZW, Packbits) droplists. - The scan is automatically assigned an identifier that will be the file name of the saved image. If required, overwrite the identifier with another name for the file.
- Click OK.
The thumbnail of the image displays in the Image pane of the Multimedia module.
- Complete the Multimedia record and save it.
- Search for a record or add a new record in the module that supports multimedia.
- From the Tabs pane, select the Multimedia tab.
A Multimedia tab will be added to the Ribbon.
- Select Scan on the Multimedia tab of the Ribbon.
In some cases, the document / image to be scanned will be previewed automatically in the scanning application; in others it will be necessary to select a Preview option.
- Prepare the scan as required. For instance, you may wish to:
- Crop the image / document.
- Scan in full colour or black and white.
- Scan in high / low resolution, etc.
- Scan the image / document.
The Add Scanned Image box displays:

- Select the appropriate settings from the Format (e.g.
TIFF, BMP, GIF) and Compression (e.g. No Compression, LZW, Packbits) droplists. - The scan is automatically assigned an identifier that will be the file name of the saved image. If required, overwrite the identifier with another name for the file.
- Click OK.
The thumbnail of the image displays in the Image pane of the module.
- Save the record.
The image is saved to EMu's multimedia repository and can be located in the Multimedia module.
Images can be printed from within the Multimedia module or from the Multimedia tab in any module to which the image is attached. The method for printing the image is the same in either case.
In addition to a default print format, your Systems Administrator can configure a number of image print formats in the EMu Registry. Each print format specifies the:
- Size that the image will be printed according to the page size selected
- Image layout (alignment, margin space and text placement) according to the page size selected
- Text to be printed together with the image
- Format of text to be printed, e.g. size, appearance, language.
Here we demonstrate how to print an image attached to a Parties record:
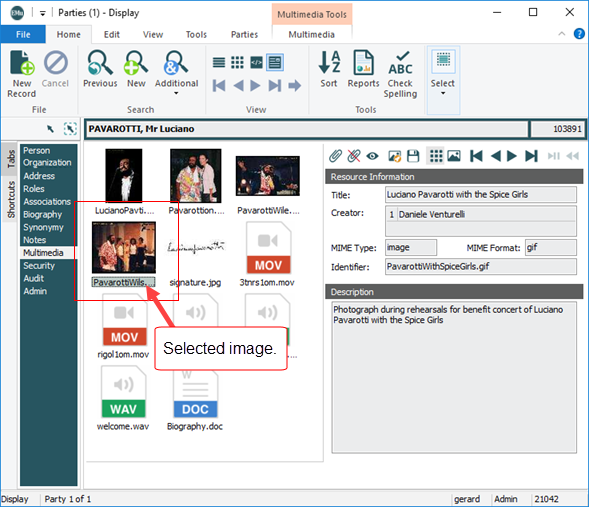
- If there is more than one image on the Multimedia tab of the Parties record, select the image that you want to print:
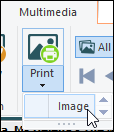
- Select Print on the Multimedia tab of the Ribbon.
A drop list will display with all available print format:

The default print format is Image: this prints the image in its original size if it fits on the selected page size or scaled down if it is too large to fit on the page.
- Select the required print format option, e.g. Image.
The Print box displays.
- Select the required printer (and if required, select Properties to set the print layout, e.g. Portrait or Landscape; select Advanced to change the paper size, e.g. A3, Legal).
- Click OK to print the image.
An error message will display if the selected paper size is not supported.
It is possible to print a tab - or rather the Display pane on a tab - including all data contained in it.
Note: The Tabs / Shortcuts pane, Ribbon and Menu bar do not print. See The EMu module window for a description of each component of the module window.
- From a module Menu bar, select File>Print Tab (
CTRL+P) to display the Print box. - Select the required printer and click OK.


