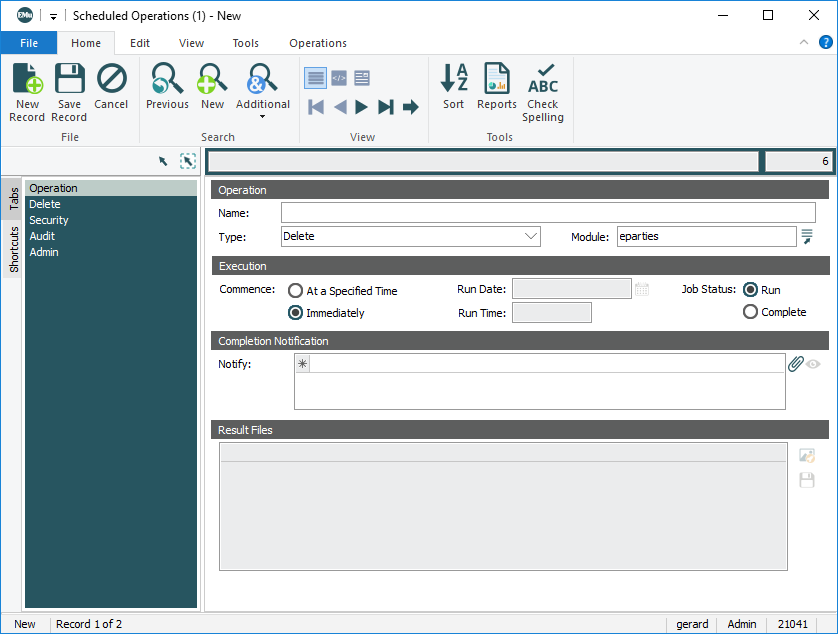
In order to use the Scheduled Operations facility, a user must have (or be a member of a group that has) both the daInsert permission and Table Access to the Operations module (eoperations).
By default, three operations are available: Delete, Image Import and Merge. Additional operations can be defined. See How to create an additional type of Scheduled Operation for details.
The Scheduled Operations facility enables the scheduling of operations to be run immediately or at a specified date and time. Operations are scheduled in the Scheduled Operations module, which is accessed by selecting  in the Command Centre.
With the Scheduled Operations facility it is possible to define:
- The type of operation to run
- The module to apply the operation to
- A time to commence the operation
- People to notify when the operation is complete
A scheduled operation is defined and stored as a record in the Scheduled Operations module.
When a scheduled operation is run, any files created during the operation are listed in the Result Files table on the Operation tab. Result files can be viewed and saved.
Audit logs are produced for all scheduled operations, allowing suitably authorized users to search / view the results of all operations performed by all users.
EMu supports four types of scheduled operation:
- Merge Records
- Delete Records
- Image Import
- Schedule
Note: System Administrators can define additional types of Scheduled Operation. See How to create an additional type of Scheduled Operation for details.
|
Tab |
Description |
|---|---|
|
On the Operation tab it is possible to define:
Scheduled operations can be specified to run at a specified time or immediately. For each operation executed a Results File is created and added to the Result Files table on the Operation tab. From here they can be saved and viewed:
|
|
|
When Delete is selected from the Type: (Operation) drop list on the Operation tab, the Delete tab displays. The Delete tab lists the module from which records are to be deleted. It is used to specify which records are to be deleted. |
|
|
When Image Import is selected from the Type: (Operation) drop list on the Operation tab, the Image Import tab displays. The Image Import tab is used to provide the pathway to the image files to be imported and an optional Import Identifier to display in the Import Identifier field on the Admin tab of all Multimedia records created through this scheduled import. |
|
|
When Merge is selected from the Type: (Operation) drop list on the Operation tab, the Merge tab displays. The Merge tab lists the module in which the merge will take place. It is used to specify the Target Record and the records which will be merged with the Target Record. |
|
|
When Schedule is selected from the Type: (Operation) drop list on the Operation tab, the Schedule tab displays. Select a scheduled export and specify the time at which it will run. |
|
|
Notes |
See Notes tab for details. |
|
Security |
See Security tab for details. |
|
Audit |
See Audit tab for details. |
|
Admin |
See Admin tab for details. |

 .
. beside the Result Files table
